
Surface roughness refers to the irregularities and texture present on a material’s surface. These features play a critical role in determining how a product performs and interacts with its environment. Industries like medical manufacturing, semiconductors, and consumer goods rely heavily on surface roughness measurements to ensure quality and functionality. For example, in medical devices, roughness impacts biocompatibility and tissue integration, while in electronics, it affects electrical resistance and heat dissipation.
Measuring surface roughness is essential for predicting product performance. It influences factors such as friction, durability, and energy efficiency. In the automotive sector, improper surface texture can lead to faster wear and increased risk of corrosion in engine components. Tools like stylus profilometers and laser microscopes, along with advanced techniques, help manufacturers achieve precise surface finishes.
Key Takeaways
- Surface roughness impacts how products work. Smoother surfaces lower friction and last longer.
- Different tools have specific uses. Stylus profilometers work on flat areas. Laser microscopes are best for fragile materials.
- Knowing roughness terms like Ra, Rz, and Sa helps pick the right tools.
- Checking tools often is important. It keeps measurements correct and dependable.
- Following global rules makes measurements consistent. This improves product quality in many industries.
Understanding Surface Roughness
What is Surface Roughness?
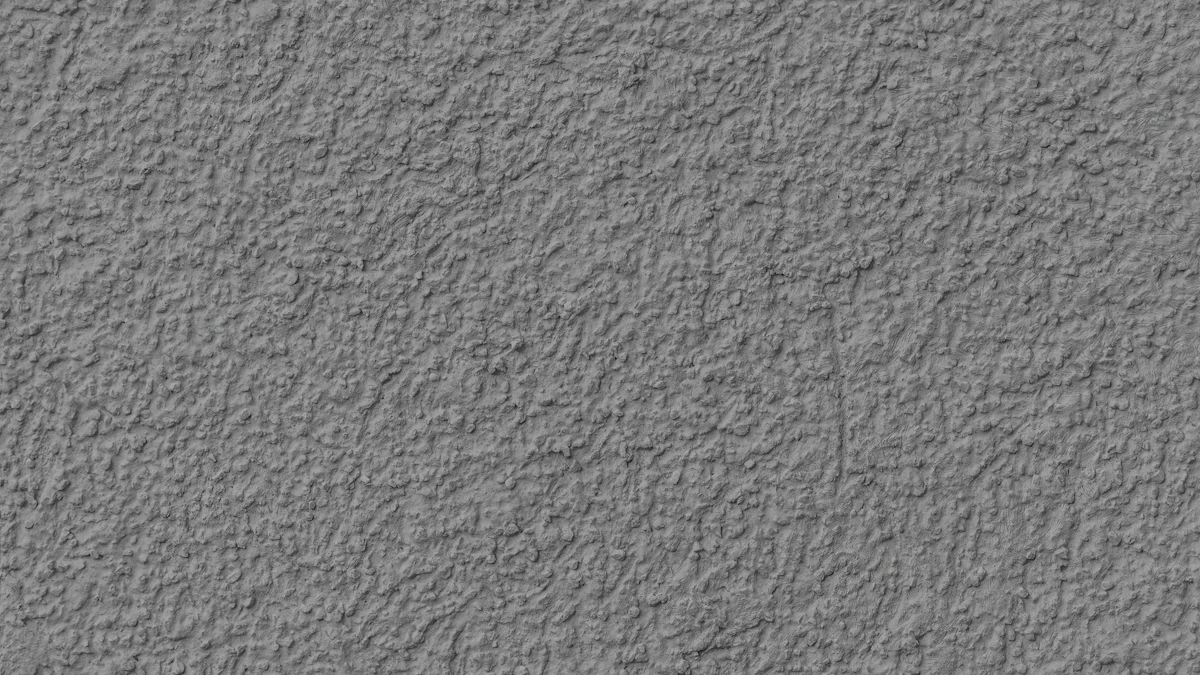
Surface roughness refers to the small, finely spaced irregularities present on a material’s surface. These irregularities may not be visible to the naked eye but can often be felt by touch. In engineering and manufacturing, surface roughness is a critical aspect of surface texture, which includes roughness, waviness, lay, and flaws. It measures the minute deviations from an ideal flat plane, often caused by machining processes or material properties.
Key concepts in surface roughness include:
- Primary profile: Represents the overall shape of the surface, including all irregularities.
- Roughness profile: Focuses on small-scale variations, such as peaks and valleys, above and below the waviness profile.
- Waviness profile: Captures larger-scale undulations or waves on the surface.
These profiles help engineers analyze and quantify surface characteristics, ensuring products meet design and functional requirements.
Importance of Surface Roughness
Surface roughness significantly impacts product performance and quality. Higher roughness can increase friction, leading to reduced efficiency and faster wear. Smoother surfaces, on the other hand, enhance durability by minimizing friction and wear. Consistent surface finishes are essential for reliable performance, especially in industries like aerospace and automotive.

In aerospace, precise surface textures ensure optimal performance of gaskets and seals, preventing leaks. In automotive applications, improper surface roughness in engine components can lead to increased friction, reduced efficiency, and quicker wear. For example:
| Example | Impact on Product Quality |
|---|---|
| Engine piston with rough cylinder bore | Increased friction and decreased efficiency |
| Medical device implants with rough surfaces | Better integration with tissue, reduced friction and discomfort |
| Cutting tools with specific surface finishes | Enhanced wear resistance and extended lifespan |
Measuring surface roughness ensures products meet industry standards and perform as intended. Techniques like stylus profilometry and laser microscopy help manufacturers achieve precise surface finish, improving product reliability and customer satisfaction.
Methods for Measuring Surface Roughness
Profile Method
How it works and its applications
The profile method relies on a two-dimensional measurement technique to analyze surface roughness. Instruments like stylus profilometers trace the surface to generate a roughness profile. This profile captures the fine irregularities present on the material. The method calculates parameters such as Ra (average roughness), Rq (root mean square roughness), and Rz (maximum peak-to-valley height). These parameters are standardized under ISO 21920-2:2021, ensuring consistency in surface roughness measurement across industries.
This method is widely used in applications requiring precise linear measurements. For example, it is effective in evaluating machined components, such as engine parts, where accurate surface texture is critical for performance. Manufacturers in the automotive and aerospace sectors often rely on this technique to ensure their products meet stringent quality standards.
Limitations of the method
Despite its precision, the profile method has limitations. It only provides a two-dimensional view of the surface, which may not fully represent the texture of complex or irregular surfaces. Additionally, the process can be time-consuming, as it requires careful alignment and calibration of the instrument. The stylus tip may also wear out over time, potentially affecting measurement accuracy.
Areal Method
How it works and its applications
The areal method offers a three-dimensional approach to measuring surface roughness. This technique captures a larger area of the surface, providing a comprehensive view of its texture. Advanced tools like laser microscopes and optical interferometers are commonly used for this method. They scan the surface to generate a detailed map, which helps identify random defects and variations.
Industries benefit significantly from the areal method due to its efficiency and accuracy.
- It captures comprehensive surface characteristics, making it ideal for complex geometries.
- It improves measurement efficiency by covering larger areas in less time.
- It identifies random defects that might be missed by 2D techniques.
- It provides a larger field of view, ensuring robust and reliable measurements.
- It generates higher statistical data, offering a more representative analysis of surface texture.
Limitations of the method
While the areal method excels in many areas, it has drawbacks. The equipment required is often expensive and may not be accessible to smaller manufacturers. The technique also demands skilled operators to interpret the data accurately. Additionally, the method may not be suitable for surfaces with extreme curvature or highly reflective materials, as these can interfere with the measurement process.
Tools for Measuring Surface Roughness

Stylus Profilometers
Overview, working principle, and applications
Stylus profilometers are widely used tools for measuring surface roughness. These devices operate by physically contacting the surface with a conical stylus, often tipped with diamond for durability. As the stylus moves across the surface, it records the topography by detecting height variations. A feedback system ensures consistent force application, enabling accurate measurements of surface characteristics.
Stylus profilometers are particularly effective for analyzing gear teeth and other machined components. They excel in applications requiring precise two-dimensional cross-sectional data, such as in the automotive and aerospace industries. However, their reliance on physical contact limits their ability to detect localized features on complex surfaces.
Advantages and limitations
Stylus profilometers offer several advantages:
- High precision for linear measurements.
- Compatibility with standardized roughness parameters like Ra and Rz.
- Cost-effectiveness compared to advanced optical tools.
However, they also have notable limitations:
- Difficulty in measuring soft or fragile surfaces.
- Potential surface damage during measurement.
- Inability to capture features smaller than the stylus tip.
- Slow speed for three-dimensional measurements.
- Wear and tear of the stylus tip over time.
Laser Microscopes
Overview, working principle, and applications
Laser microscopes utilize advanced 3D laser confocal scanning technology to measure surface roughness without physical contact. These tools emit laser light to scan the surface, capturing fine irregularities and generating high-resolution images. This noncontact approach prevents damage to delicate surfaces, making laser microscopes ideal for industries like electronics, automotive, and materials science.
Applications include analyzing microchips, automotive components, and advanced materials. The demand for noncontact techniques has grown due to the limitations of traditional stylus gauges, particularly for soft or intricate samples. Laser microscopes address this need by providing accurate, nondestructive measurements.
Advantages and limitations
Laser microscopes offer several advantages:
- No physical contact, preventing surface damage.
- Finer roughness measurement data due to the laser’s small radius (0.2 μm).
- Comprehensive data collection, including 3D features and color images.
- Automated inspection workflows, reducing operator variability.
Despite these benefits, laser microscopes are expensive and require skilled operators. Their complexity may also limit accessibility for smaller manufacturers.
Optical Interferometers
Overview, working principle, and applications
Optical interferometers measure surface roughness by analyzing interference patterns created by light waves. White Light Interferometry (WLI) is a common technique that captures detailed surface profiles with sub-nanometer vertical resolution. This method ensures high precision and complies with international standards, making it reliable for various applications.
Optical interferometers are used in industries requiring extreme accuracy, such as semiconductor manufacturing and precision optics. Their ability to measure intricate surfaces with high resolution makes them indispensable for advanced engineering applications.
Advantages and limitations
Optical interferometers provide unparalleled vertical resolution and are ideal for noncontact measurements. However, their high cost and sensitivity to environmental factors, such as vibrations, can pose challenges. Skilled operators are essential for accurate data interpretation.
Atomic Force Microscopy (AFM)
Overview, working principle, and applications
Atomic Force Microscopy (AFM) is a powerful tool for measuring surface roughness at the nanoscale. It operates by scanning a sharp probe, often made of silicon or silicon nitride, across the surface. The probe detects minute variations in topography by measuring interaction forces between the tip and the sample. These forces are converted into detailed nanoscale topographical data. AFM provides high-resolution 3D images, revealing surface morphology and identifying defects.
AFM quantifies surface roughness using parameters like Sa (3D roughness average) and Sq (root mean square roughness). These parameters help analyze the overall texture and identify features such as nucleation sites or growth patterns. The technique is widely used in industries like semiconductor manufacturing, where precise nanoscale measurements are critical. It also plays a key role in materials science, enabling researchers to distinguish between amorphous and crystalline phases.
Advantages and limitations
AFM offers several advantages over other surface roughness measurement tools:
- It provides nanoscale resolution, making it ideal for applications requiring extreme precision.
- The 3D topography images offer high-fidelity data, revealing intricate surface details.
- It can distinguish between different material phases, enhancing its versatility.
- AFM is essential for industries like electronics and nanotechnology, where accurate surface characterization is vital.
Despite its strengths, AFM has limitations. The equipment is expensive, which may restrict its use to specialized laboratories or large-scale manufacturers. Skilled operators are required to handle the instrument and interpret the data accurately. Additionally, the scanning process can be time-consuming, especially for large surface areas. AFM also struggles with soft or sticky materials, as these can interfere with the probe’s movement.
By combining high-resolution imaging with precise surface roughness measurements, AFM remains a cornerstone in advanced surface analysis techniques.
Surface Roughness Parameters and Tool Selection

Common Surface Roughness Parameters
Explanation of Ra, Rz, and Sa
Surface roughness parameters quantify the texture of a surface, helping engineers evaluate its suitability for specific applications. Among these, Ra, Rz, and Sa are the most commonly used.
- Ra (Average Roughness): This parameter represents the arithmetic average of absolute deviations from the mean line of the surface profile. It provides a general indication of surface texture and is widely used in industries like automotive and aerospace.
- Rz (Maximum Height): This parameter measures the average peak-to-valley height across five sampling lengths. It is more sensitive to extreme surface features, making it ideal for applications requiring detailed analysis of peaks and valleys.
- Sa (Areal Roughness): Unlike Ra and Rz, Sa evaluates the surface texture in three dimensions. It calculates the average height deviations over an area, offering a comprehensive view of surface characteristics.
| Parameter | Description | Calculation Method |
|---|---|---|
| Ra | Average roughness, average of profile height deviations from the mean line. | Arithmetic average of absolute values of surface height deviations over the evaluation length. |
| Rz | Maximum peak-to-valley height over set distance. | Average of maximum peak-to-valley heights within five equal sampling lengths. |
| Sa | Areal roughness, average height deviations over a surface area. | Arithmetic average of height deviations over the measured area. |
Examples of Parameter Applications
- Ra: Used in evaluating machined surfaces for automotive engine components to ensure smooth operation.
- Rz: Applied in quality control for seals and gaskets in aerospace to prevent leaks.
- Sa: Essential in semiconductor manufacturing, where nanoscale surface analysis is critical for performance.
Choosing the Right Tool
Factors to consider: surface type, precision, and application needs
Selecting the appropriate tool for measuring surface roughness depends on several factors. Each tool and technique offers unique advantages, making it essential to match the tool to the application requirements.
- Surface Type: The material and geometry of the surface influence the choice of tool. For instance, stylus profilometers work well on flat, hard surfaces, while optical interferometers excel on delicate or reflective materials.
- Precision Requirements: Applications demanding nanoscale accuracy, such as semiconductor manufacturing, benefit from tools like Atomic Force Microscopy (AFM). For less critical tasks, stylus profilometers or laser microscopes may suffice.
- Application Needs: Consider the measurement length, environmental conditions, and data evaluation methods. For example, optical techniques like interferometry are ideal for capturing intricate details in controlled environments.
| Factor | Description |
|---|---|
| Measurement Length | The length over which the surface parameters are evaluated, crucial for capturing representative features. |
| Environmental Conditions | Factors like temperature and humidity that can affect measurement outcomes. |
| Method of Data Evaluation | The approach used to analyze the data, which can influence the interpretation of results. |
Tip: Always ensure the tool aligns with the surface roughness parameters required for the application. For example, Ra and Rz measurements may need different tools than Sa evaluations.
By carefully considering these factors, manufacturers can achieve accurate and reliable surface roughness measurements, ensuring product quality and performance.
Standards and Best Practices
International Standards
Overview of ISO standards for surface roughness
International standards play a vital role in ensuring consistency and accuracy when measuring surface roughness. ISO 4287, 4288, and 3274 define key roughness parameters and outline procedures for using contact stylus instruments. These standards help industries achieve reliable measurements and maintain uniformity across applications. For three-dimensional areal roughness parameters, ISO 25187-2 provides comprehensive guidelines.
DIN EN ISO 21920 establishes the methodology and terminology for surface texture measurement. While it does not specify tolerances, it focuses on how roughness is measured and communicated. This standard is widely adopted in industries like mechanical engineering, electronics, and automotive to ensure consistent communication of surface quality requirements.
Adhering to these standards offers several benefits. It ensures accuracy in material characterization, maintains quality across testing methods, and provides reliable results for various applications. By following these guidelines, manufacturers can optimize product performance and drive innovation in material development.
Best Practices
Tips for calibration, setup, and accurate data interpretation
Proper calibration and setup are essential for obtaining accurate surface roughness measurements. Following these best practices can help ensure reliable results:
- Measure the calibration reference standard and evaluate it using the Ra parameter.
- Compare the measured Ra value to the certified value, ensuring it falls within the manufacturer’s specified error range (typically no more than +10%).
- Inspect the probe for wear or damage if the error exceeds the allowable range.
- Recertify reference standards every one to two years to maintain accuracy.
- Perform a stylus integrity check after calibration to verify correct results.
- Calibrate new probes immediately to establish a baseline for future inspections.
Interpreting surface roughness data can present challenges. Real-world surfaces often exhibit diverse features, complicating the measurement process. Using areal techniques can help address this variability. Additionally, understanding the limitations of different methods, such as potential damage from contact techniques or difficulties with reflective surfaces in non-contact methods, is crucial. Advanced data analysis tools can also simplify the interpretation of large datasets, ensuring accurate and meaningful results.
By adhering to these best practices, manufacturers can maintain tight control over surface finishes, meet industry standards, and enhance product performance.
Surface roughness measurement plays a vital role in ensuring product quality and performance. For instance, rough surfaces in engine components can increase friction, reducing efficiency, while smoother finishes enhance durability and wear resistance. In medical devices, surface texture influences tissue integration and patient comfort. Accurate measurement not only predicts product lifespan but also optimizes manufacturing processes for consistent results.
The blog explored various tools and techniques, including stylus profilometers, laser microscopes, and atomic force microscopy. Each tool offers unique advantages, catering to specific applications and precision needs. Parameters like Ra, Rz, and Sa provide valuable insights into surface characteristics, helping manufacturers achieve desired outcomes.
Readers seeking deeper insights can explore resources on advanced measurement methods or consult experts specializing in surface analysis. Tools like Form Talysurf® PGI NOVUS and handheld Surtronic® devices offer practical solutions for diverse industrial needs.
By understanding surface roughness and leveraging the right tools, manufacturers can enhance product reliability, improve efficiency, and maintain high standards of craftsmanship.
FAQ
What is the most commonly used surface roughness parameter?
Ra, or average roughness, is the most widely used parameter. It provides a general measure of surface texture by calculating the average deviation of surface heights from the mean line. Industries like automotive and aerospace rely on Ra for quality control.
Can surface roughness measurement tools damage delicate surfaces?
Contact tools, such as stylus profilometers, may damage soft or fragile surfaces. Noncontact methods, like laser microscopes or optical interferometers, are better suited for delicate materials. These tools prevent physical contact while maintaining high accuracy.
How often should surface roughness measurement tools be calibrated?
Calibration should occur annually or biannually, depending on usage frequency and environmental conditions. Regular calibration ensures accurate measurements. Manufacturers should also inspect tools for wear or damage before each use to maintain reliability.
Why is 3D surface roughness measurement important?
3D measurement captures a surface’s complete texture, including peaks, valleys, and defects. This method provides a more comprehensive analysis than 2D techniques, making it essential for complex geometries or applications requiring detailed surface characterization.
What industries benefit most from surface roughness measurement?
Industries like aerospace, automotive, medical devices, and semiconductors benefit significantly. Accurate roughness measurements improve product performance, durability, and safety. For example, medical implants require precise textures for better tissue integration, while semiconductors demand nanoscale accuracy for optimal functionality.
